SLIDER

Planner
Showing posts with label Planner. Show all posts

If You Give a Girl a Planner: Bookish Notebook

Nov 2, 2020
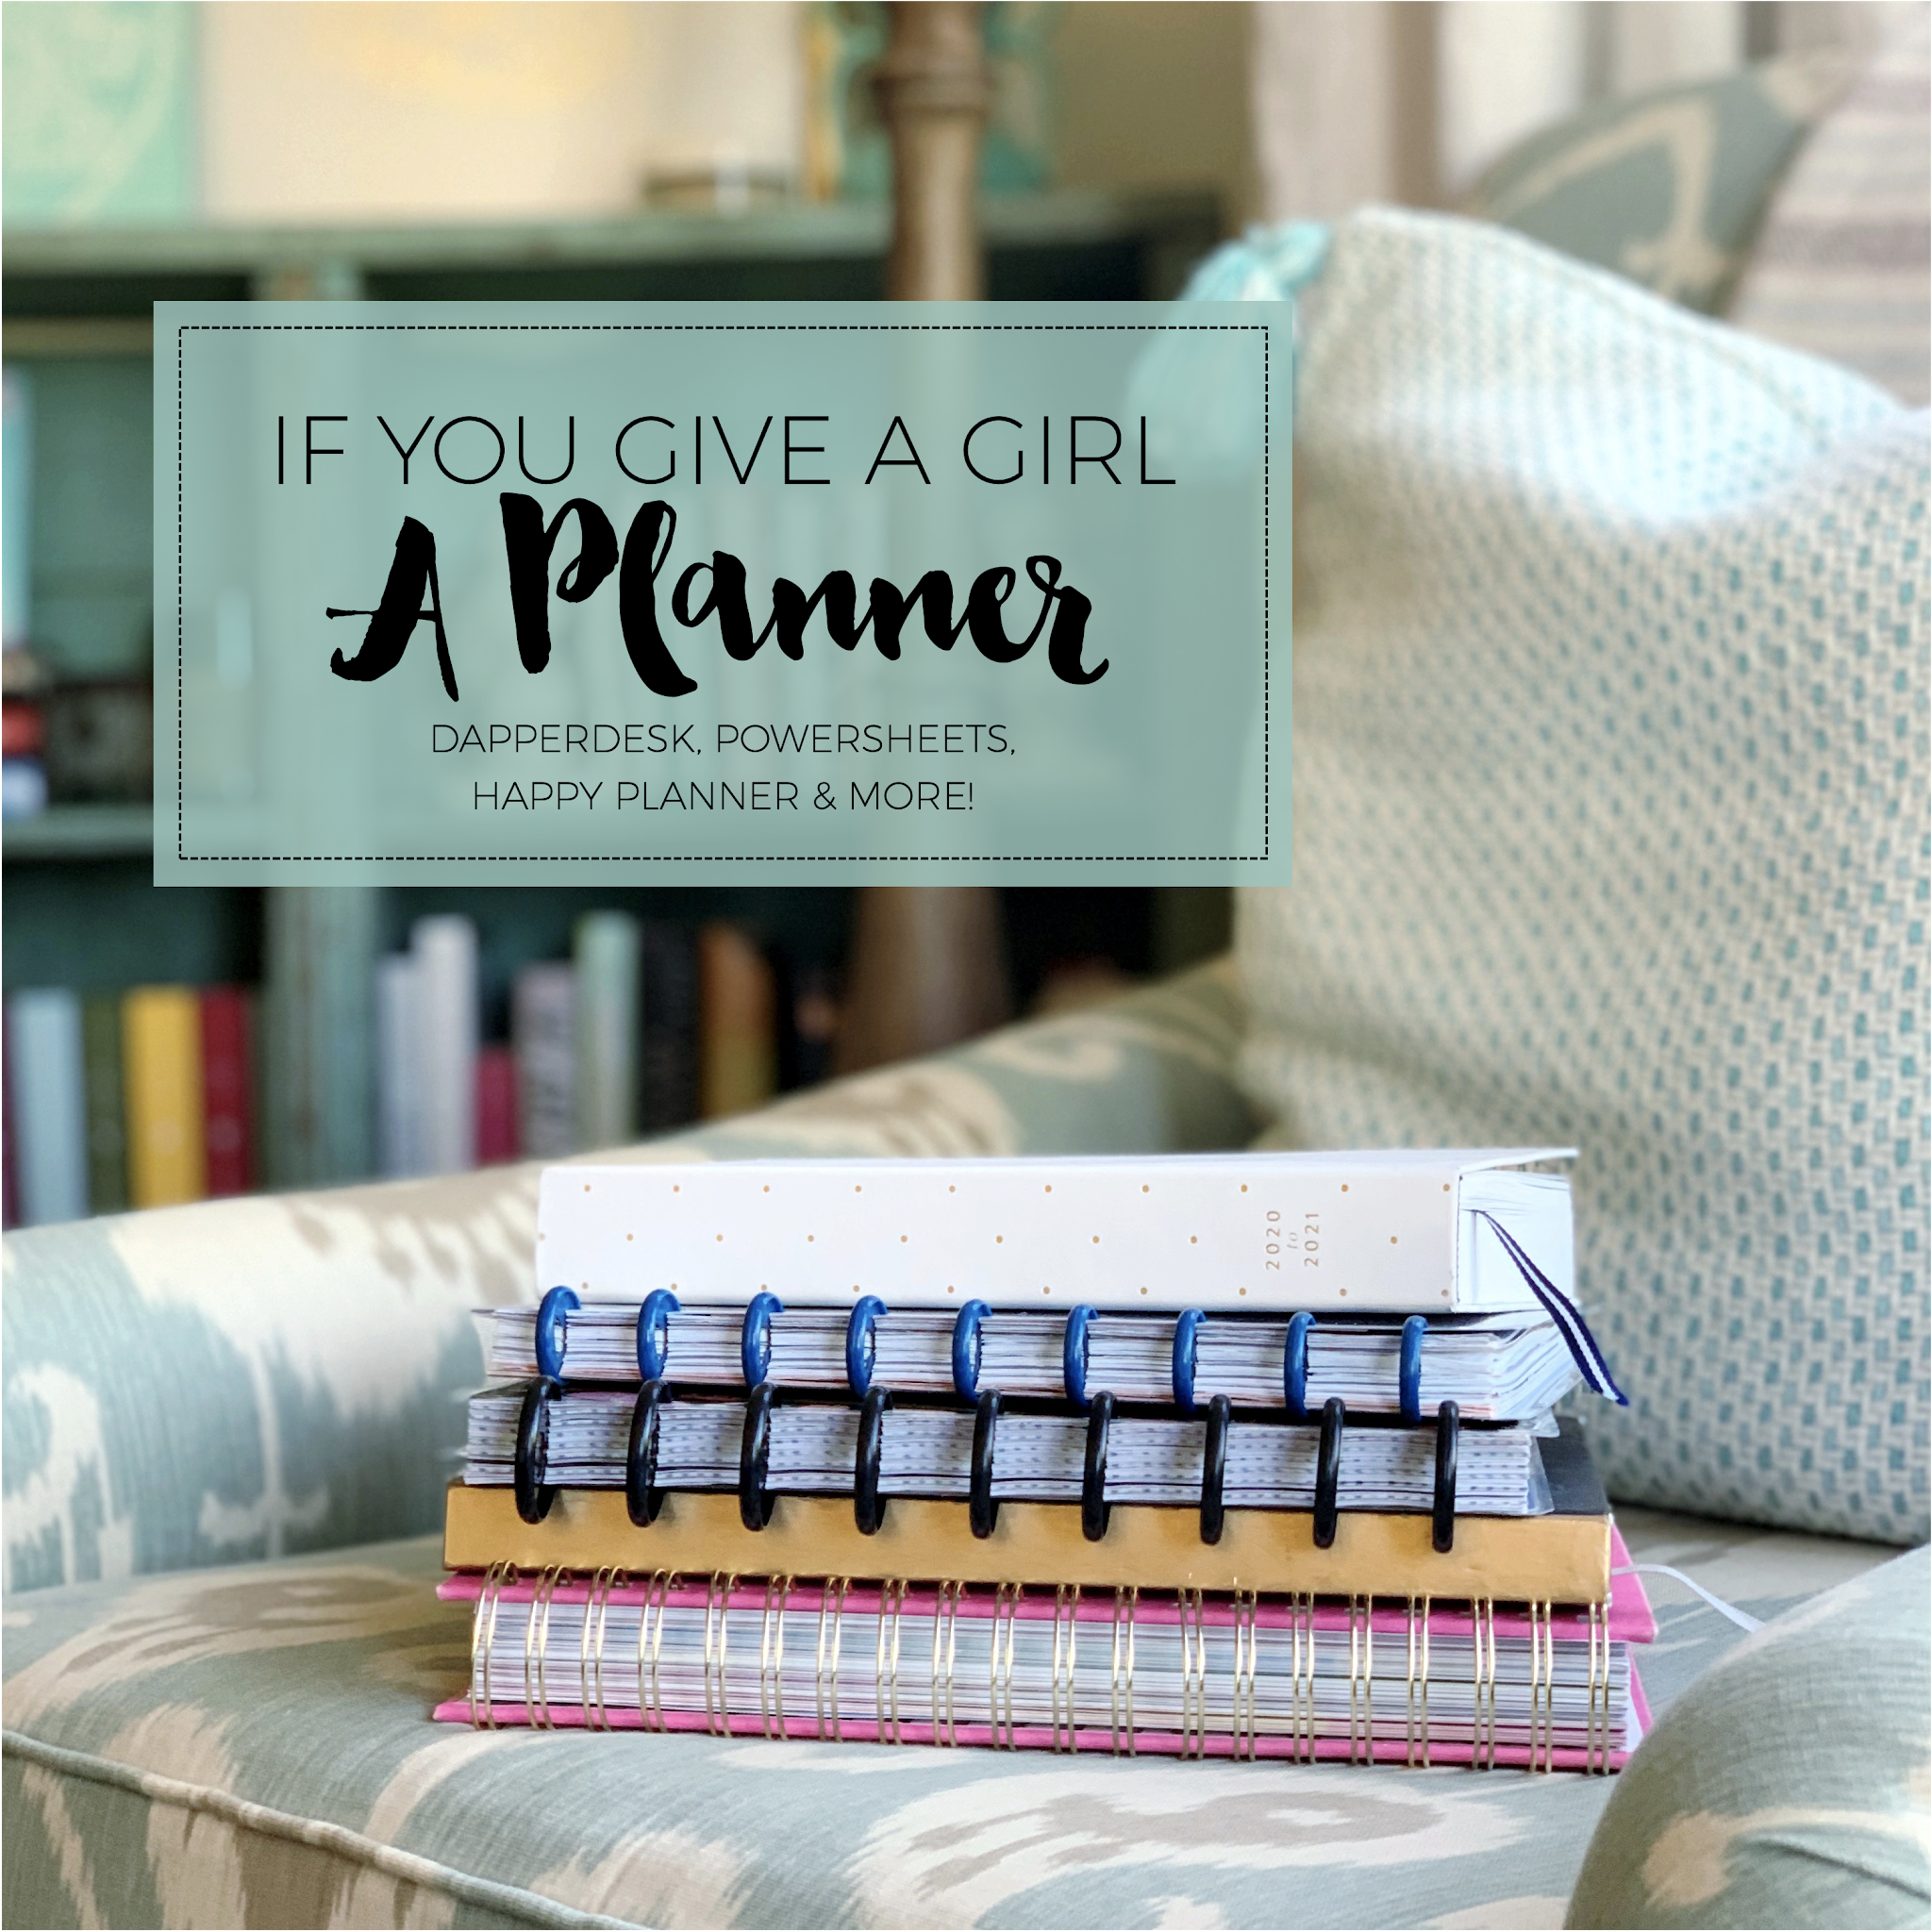

If you give a girl a planner, she's going to ask you for a pen, some stickers... and maybe a notebook to go with it. I'm so obsessed with all things paper! I love trying new things and then blogging about it. So, for the last few days, I've shared my 2020 planner lineup. I talked about what I've been using for my daily life, personal goals, and reading journal. Today, I'm wrapping it up with my favorite: my bookish bullet journal / notebook!


This notebook is from The Happy Planner line called Happy Notes. They come in different sizes, and this is the Classic. I believe they all have the mini size rings, three tabbed dividers, and 60 sheets of paper that are either blank, lined, or dot grid (depending on the notebook you choose). I usually buy dot grid because that's my favorite, but you can also buy refill paper in any style if you fall in love with a certain notebook but want different paper.

I usually refer to this as my bookish bullet journal, even though that isn't quite accurate. I tried bullet journaling but never got the hang of it. The format became time consuming for me because I tended to overthink it, but I loved the concept. That's when I got the idea to use my Happy Planner as a pseudo-bullet journal. Instead of drawing everything by hand, I'd make printable pages. And with the disc binding, it was easy to move pages around until I had it just right. It's basically my bookish notebook that's completely customized to me.

When I posted about this notebook back in 2018, I used actual Happy Planner pages for the bulk of my blog planning. Now, my entire notebook is printables that I made for myself. I'm so excited to show you some highlights! My reading notebook is divided into three sections, and I'll show you photos of a handful of pages from each section + will list out what other pages I've included in each. Here are the three sections:

+ Section 1: Challenges, TBR, and Trackers
+ Section 2: Blog Post Planning
+ Section 3: Brainstorming

Let's start at the very beginning!

SECTION 1: CHALLENGES, TBR, AND TRACKERS


GOODREADS CHALLENGE
The very first page of this section is for my Goodreads Challenge. I make my goal 100 books, even though I typically hit it long before the end of the year. I love having a goal but don't want to make it such a challenge that I become too focused on the quantity of what I'm reading versus the quality. When I finish a book, I draw a heart if it was a 4.5/5-start read, a check mark if it was a 3.5/4-star read, or a blue x if it was 3 stars or below. It's fun to see a quick glance to see how I've felt about what I've been reading lately. When I meet the goal, I fill in the date at the bottom.


MISC. CHALLENGES
Next are the pages for the various challenges that I've set for myself or joined. This changes from year to year! There are more pages than the two above, but they're all similar. Here's what you'll find in my 2020 notebook:

+ 2020 Re-Read Challenge: My goal was to re-read at least 12 books, so one per month. I had space to fill that in + an area to brainstorm potential re-reads. I'd completed this goal by May.

+ Picky Pledge Challenge: This is something Alexa and I do every year, which you can read about here. I've got all 12 categories listed with space to write what I've read for each. I've still got a few left to complete!

+ Non-Fiction Challenge: My goal was to read 12 non-fiction books in 2020 because I own a lot of non-fiction but don't frequently reach for it. I shocked myself by completing this goal in June (the letter after each title indicates the month I finished the book) and have finished an additional 16 non-fiction books since then. I'll redesign this page for 2020 so that it isn't tied to a specific month, since that wasn't how I ended up using it.

+ Read or Die Challenge: Alexa came up with this back in 2018, and I decided to do it, too. At the start of a new year, I list anything that's been on my shelves from before the previous year (for 2020, anything I've owned since 2018 or before) with the goal of reading it before the end of the current year. If I don't finish it, the idea is to cull it.

+ My 10 in 20: After my successful 10 in 2019 list, I decided to do it again in 2020. I picked 10 books from my TBR to focus on finishing this year. So far... this year might be a bust. I've only read three and DNF'd one. Whoops! 

After my Challenge pages, I have several pages devoted to my TBR based on the format of the books.


TBR: PHYSICAL BOOKS
First, I have pages dedicated to my physical TBR. I have three bookshelves in my notebook: one for my Non-Fiction TBR, one for Adult Fiction, and one for Young Adult & Middle Grade Fiction. The latter is pictured above. For all my TBR pages, I only write down the titles of books I own. I use Goodreads to save books I'm interested, but I only want to actively track the things I've purchased and plan to read. When I buy a book, I add it to my shelf. Once I've read it, I color it. If I DNF it, I just color it black. And when I fill up a page? I print a new one! 


TBR: E-BOOK
After making the bookshelf, I decided I wanted something else for my e-books. So, I made a Kindle TBR printable! I write digital review copies down on one printable and digital books I've purchased on their own. Since I try to read review copies by pub date, I like separating them. I do a green check when I've read a book and a red X if I DNF it.


TBR: AUDIOBOOKS
And finally, my favorite page in the TBR section is the audiobook printable I designed! I'm most proud of this page because I was able to replicate the look of the Audible app. I write down the title, author, narrator, and length in those spaces. And in the spot where the book cover would go, I color it orange when I'm done listening to a book and write down the date I finished it. And I only use this for audiobooks that I own, not library books!


SERIES TRACKER
The last few pages in this section are related to tracking things! Here's what I've got currently:

+ Book Spending Tracker: What I bought, where I got it, and how much I spent on it
+ Review Copy Tracker: Title, release date, and I've read, reviewed, posted about it, and sent to publicist
+ Series Tracker: Series name, author, number of books in series, and color what I've read so far
+ Movie/TV Tracker: Title, number of episodes (if TV), and whether or not I've watched it

Okay, that's all for my challenges, TBR, and trackers! Now, it's time for the blogging section.

SECTION 2: BLOG POST PLANNING 


MONTHS AT-A-GLANCE
With my goal to post on the blog twice a week, this is a quick way for me to see how I'm doing at a glance. With two months per side, I love that it only takes up three pages of space. This is my first year using these page, and I'm liking them so far! I don't plan out potential blog posts – just write down things I've published.


MONTHLY RECAP
I use the same categories in my recap posts every month, so I created a printable that I could fill in throughout the month. It's made it so much easier when it's time to write the post because I'm not looking in various places (photos / my planner / Goodreads / Spotify / etc.) to joy my memory. It's double-sided, and you can see both above.

The front has four categories: Loved (favorite memories), Read (just favorites, not a full list), Heard (music or songs I had on repeat), and Watched (TV or movies, old or new). For 2021, I'm going to try adding a fifth category: Bought, for writing down favorite purchases from the month. The back is for the books I acquired, since I always include that in my posts. I've divided it into five categories: Bought, Gifted, Gift Card, and Review. 


QUICK LIT
I don't think I had this page in 2018, and it's one of my favorite additions. I write down the title of books I finish that month, and then I have boxes to the right so I can mark when I've taken a Photo, written a Review, updated Goodreads, and Logged it in my reading journal. It's a simple but effective way to stay on track with reviewing what I've read.


END OF THE YEAR 
There are some posts that I write at the end of every year, similar to the way I post a Recap and Quick Lit every month. So, it was worth it for me to create printables for those posts! The first is my My Year In series, and I have pages for:

+ My Year in Books: My favorite reads each month
+ My Year in Adventures: My favorite memories and activities from each month 
+ My Year in Music: What I listened to each season 
+ My Year in Movies & TV: Movies and tv shows that were new-to-me or rewatches
+ My Year in Beauty: My favorite makeup, skincare, and hair products
+ My Year in Obsessions: My favorite finds throughout the year + a new page for baby/big boy faves

Plus two additional pages:

+ Favorite New-to-Me Authors: A Top Ten Tuesday topic that I do every December
+ Perpetual Page-Turner's End of the Year Survey: To fill in potential answers throughout the year 

And that's the end of my blogging section!

SECTION 3: BRAINSTORMING


DOT GRID BLANK PAGES
And finally, I have some blank dot grid pages behind the last tab. I love having blank paper to jot down ideas, flesh out discussion posts (like my favorite bookish memories in the photo above), or sketch potential printables to create for myself. 

Do you have a bullet journal or bookish notebook? 
Of all my planners, I think this one is my favorite!

If You Give a Girl a Planner: Reading Journal

Oct 30, 2020


If you give a girl a planner, she's going to ask you for a pen, some stickers... and maybe a notebook to go with it. I'm so obsessed with all things paper! I love trying new things and then blogging about it. So, for the next few days, I'm sharing my 2020 planner lineup. I'll talk about what I'm using for my daily life, personal goals, reading journal, and bookish bullet journal. Today it's all about my reading journal and log!


Back in 2017, I decided to start keeping a reading log. I wasn't always timely about writing reviews for the blog or Goodreads, and then I'd struggle to remember what I thought of a book when I was done. I looked at reading journals on the market, but most fell short for various reasons – like categories that I didn't want to fill in for every single book I read, too little or too much space, or not enough pages to last me a year. Enter Happy Planner!

The beauty of Happy Planners and the disc-bound planner system is that you can customize them. If you saw my post about my 2018 reading log, today's will look very familiar. The only real difference? The size! I was previously using a Mini but switched to a Classic for 2020. I wasn't sure if it would feel too big, but it's just right. I'll chat a little more about that below. This is a 12-month horizontal planner. Let's look inside!


NOTES PAGE
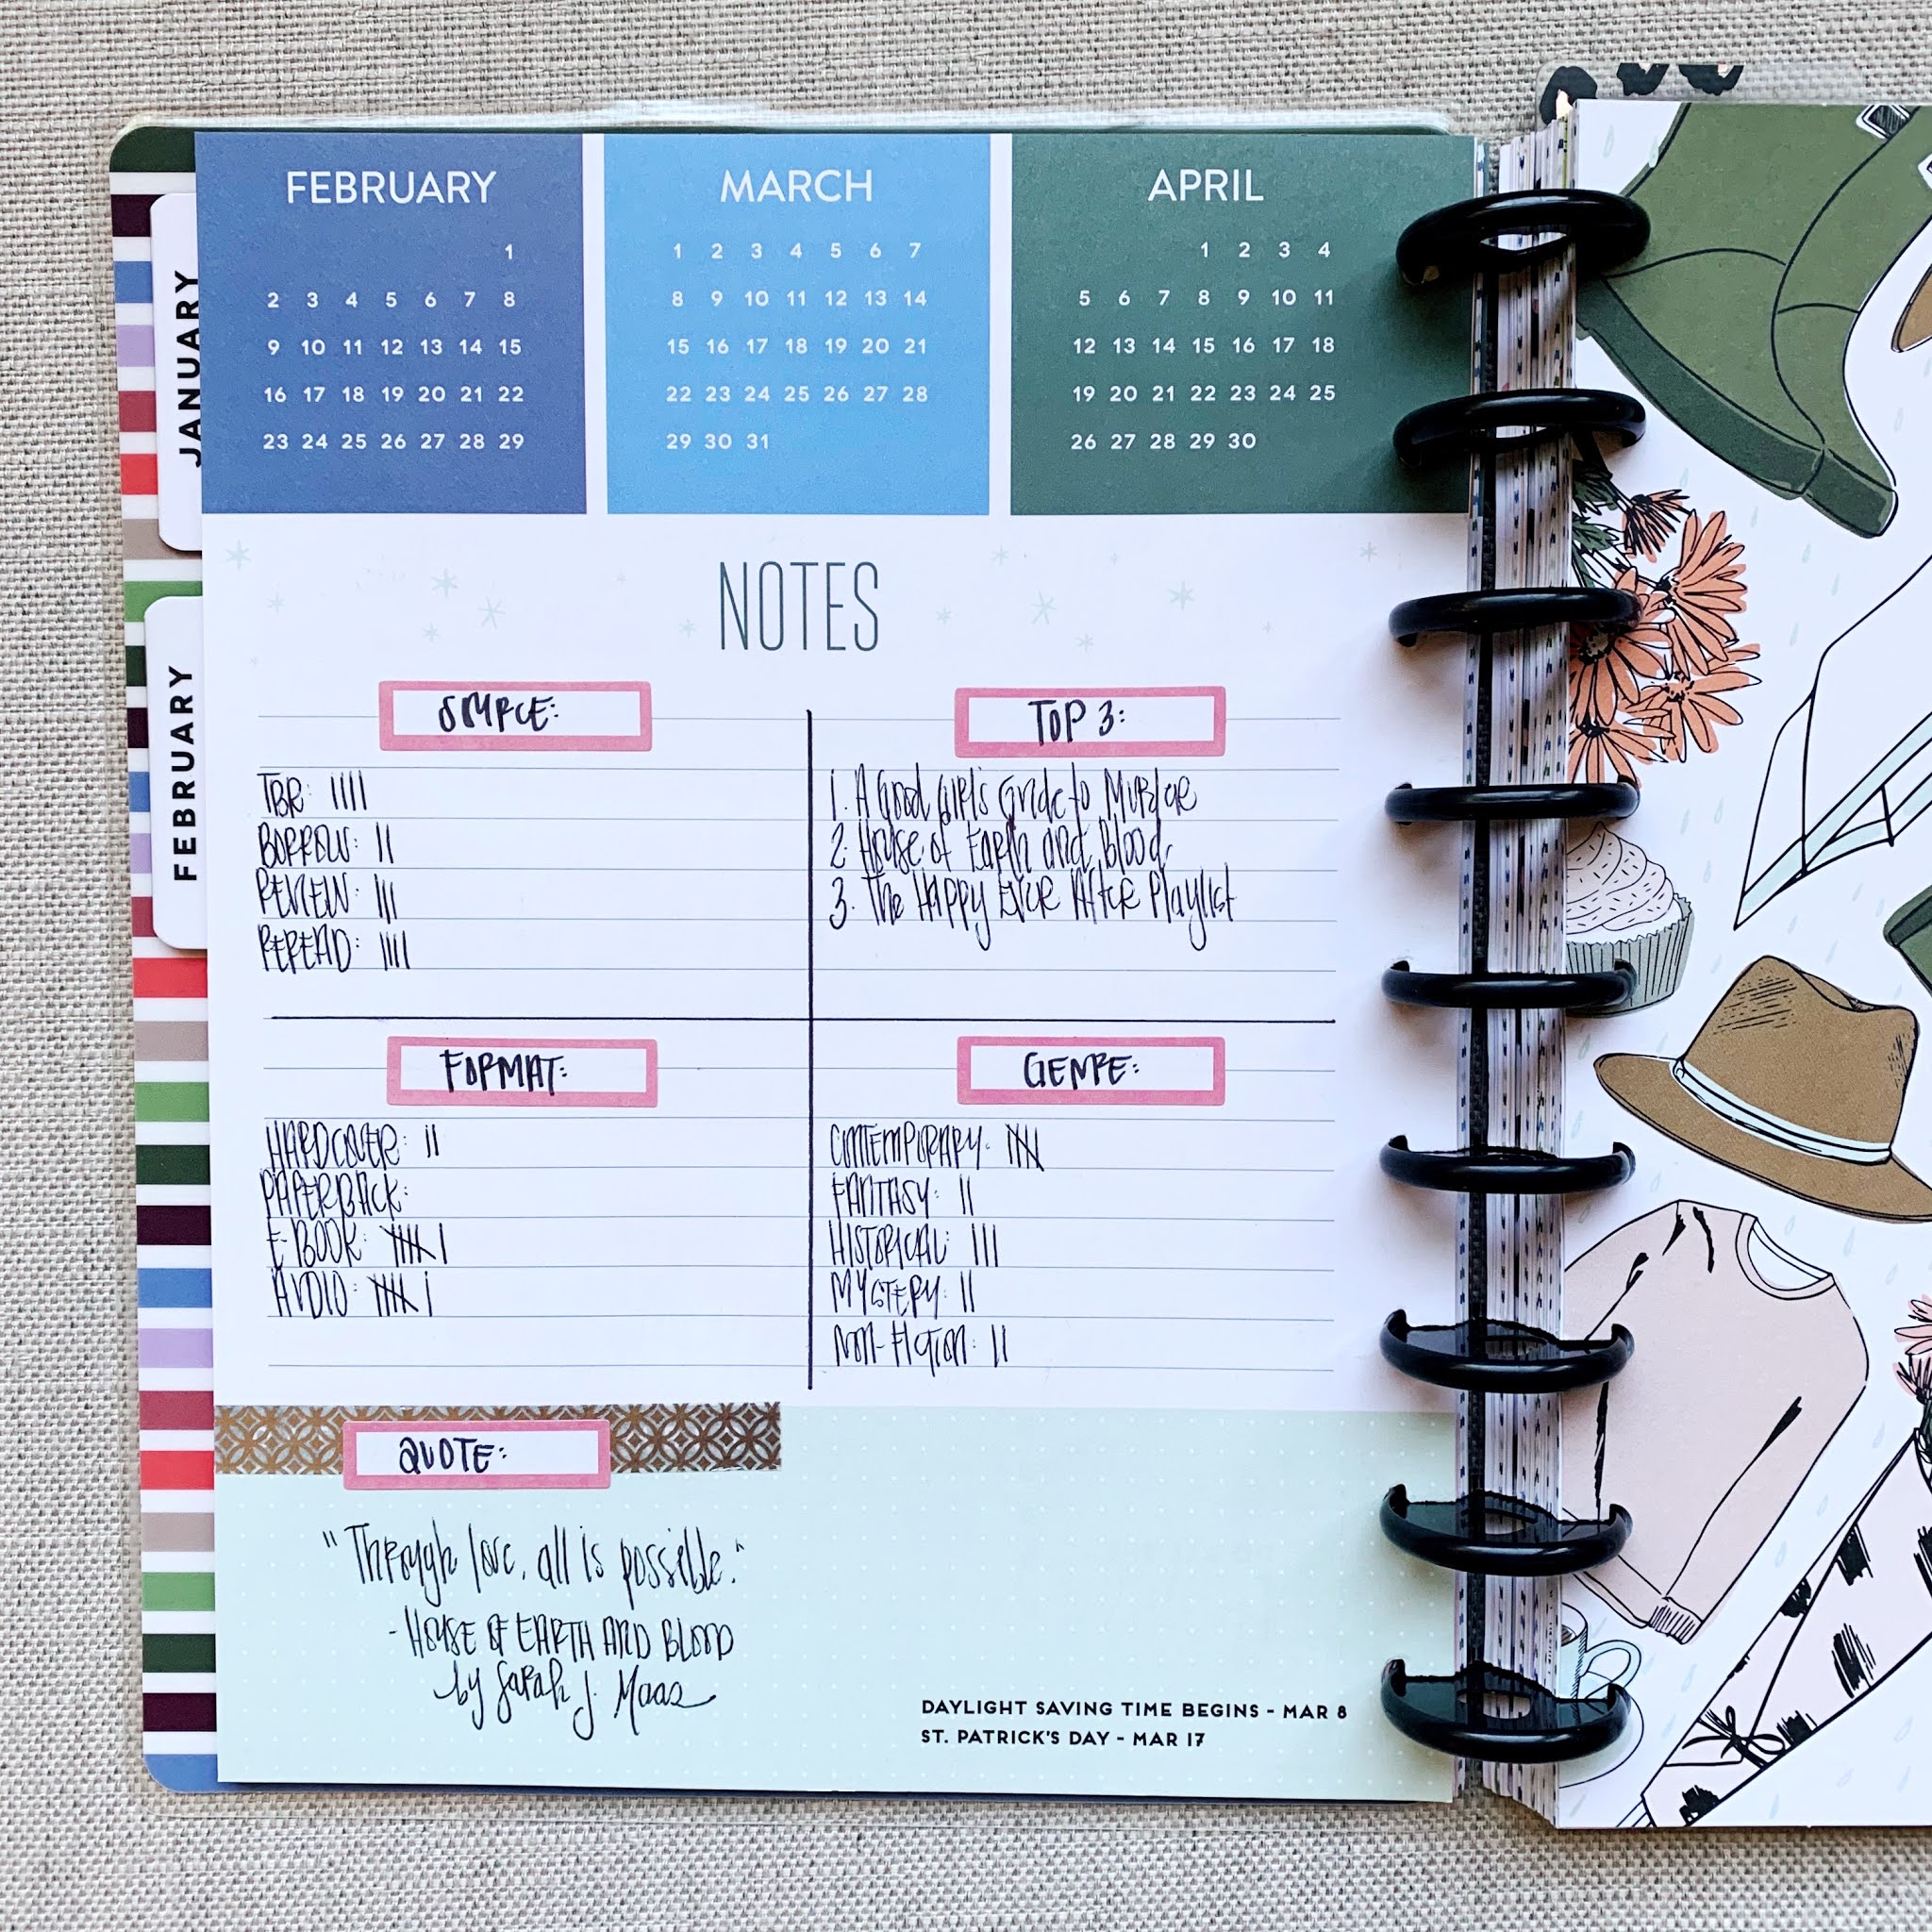
At the beginning of every month, there's a Notes page. Every Happy Planner has their own design for this page, so that usually influences which planner I choose for the year. I divide this into four sections with my pen and then use the colorful boxes stickers to add headings. This is where I track five things for that month's reads:

+ Source (TBR / Borrow / Review / Reread)
+ Format (Hardcover / Paperback / E-Book / Audiobook) 
+ Top 3 Reads of the Month
+ Genre (genres listed changed based on the month)
+ Quote (favorite from any book that month)

I love wrapping up the month by filling this out because it's a nice way to look back before diving in to new books.


MONTHLY CALENDAR
On the monthly calendar spread, I write down a book's title on the day I finished reading it. If I finish more than one book in a day, I just draw a line halfway through the box to split it up. It's super simple, but I love seeing the contrast between weeks where I only finished one book versus weeks where I was finishing a book a day. 


WEEKLY PAGES
And now we get to the heart of this planner: the weekly view! Happy Planners come in a lot of different formats, but I always buy the horizontal style for my reading log. It's just easier to write down my thoughts in a lined space. As I mentioned, I used to get the Mini size but switched to the Classic this year. I noticed in my Mini that my thoughts often sounded really shallow or repetitive because I didn't have the space to flesh them out at all. I loved that I stuck to the highlights, but looking back it felt like I couldn't write in full sentences or explain myself.

The Classic size has been nice because it gives me a little more room to go into detail but isn't as overwhelming as most things that are marketed as reading journals. I personally don't want a full page per book! I'd never keep up with it and would probably run out of pages in the notebook before the end of the year. This size and style is just right for me! On the day I finish a book, I write down:

+ The title and author
+ The format, source, and my rating
+ A few lines detailing what I thought of it

It isn't as polished as a review I'd share on the blog, but my reading journal has helped me when I've gotten behind on reviews. The bones are there! If I finish more books in a week than there are days, I'll add in a Happy Planner half-sheet and use this same format. If I finish two books on a Saturday but nothing on a Sunday, for example, I'll white out Sunday's date, put washi tape over the line, and write Saturday's date with (Cont.) after it. 

And that's all I do in my reading journal! It's simple but effective for me, which is a huge reason I'm still doing the same thing I was in 2018. I don't want to mess with something that's working. I just wish I'd always kept one! I have one other notebook where I list what I'm reading, which I decided to include in today's post.


BOOKS READ NOTEBOOK
I mentioned this notebook in one of my Happy Planner posts but never added photos of it. I thought it would be fun to include here! I bought it from Books-a-Million almost ten years ago, and that's how long I've been using it. I write down what I read every month, and I love flipping through and seeing how many books I've read since 2011.


MONTHLY LIST
Here's a look at the inside! I circle the month at the top, write down the year, and then just list everything I've read that month. I have considered including ratings, noting re-reads, and other things, but I just prefer the simplicity. It's just a notebook of lists, and I love it.  

Do you keep a reading journal or log?
On Monday, I'll finish by showing you my bookish notebook!

If You Give a Girl a Planner: Goals

Oct 29, 2020


If you give a girl a planner, she's going to ask you for a pen, some stickers... and maybe a notebook to go with it. I'm so obsessed with all things paper! I love trying new things and then blogging about it. So, for the next few days, I'm sharing my 2020 planner lineup. I'll talk about what I'm using for my daily life, personal goals, reading log, and bookish bullet journal. Today it's all about my PowerSheets Intentional Goal Planner!


I'd never purchased a goal planner before but was intrigued by the idea of PowerSheets after following the company on Instagram. When they launched their 2020 collection, I decided to give it a try. With a baby on the way at the time, I worried that I'd use them for a month and then set them aside. But the opposite happened! Because I noticed an immediate change, I felt more motivated to continue. I'm going to go through the main sections of my PowerSheets in today's post, but Cultivate What Matters' The Anatomy of PowerSheets is another reference. Their blog is a great resource overall for ideas and inspiration. Since some pages are more personal than others, I was selective about photos. But I've embedded a video with a full flip through of the 2021 PowerSheets at the end!


PREP WORK
One of the things that sets PowerSheets apart is the Prep Work. This section sets out to "lead you to uncover a big picture vision and the right goals for your unique life and season." It does this through a series of thoughtful questions and prompts – asking you to examine things like what makes you come alive, what's holding you back, what's worked (and hasn't) in the past, lessons you've learned, and what you want your legacy to be.

In my 2020 PowerSheets, this section is 34 pages long. The 2021 edition has been reduced to 21 pages. And looking through it, I love all the changes! They redesigned and simplified this section to make it impactful but easier to complete. It looks like it will be a little less repetitive, too. Although I find this section valuable, it's probably my least favorite part of PowerSheets. Maybe I already think enough about some of these things that nothing felt particularly eye-opening? But I loved parts of it, like making a vision board and choosing a word of the year.

Overall, I appreciate having a section that helps you prepare. Instead of diving into the details, it forces you to focus on the big picture. So, you end up with more meaningful goals and accomplish what actually matters to you.


GOALS + GOAL REFRESH
Immediately following the Prep Work, it's time to set your goals. It encourages you to set goals that are connected to your big picture, and then it dives deeper by asking you if you realistically have the resources to achieve a specific goal and whether it's the right season for it. I love this aspect of their goal setting work. Sometimes I want to accomplish something that really is important to me, but I'd be squeezing it into a season with very little margin. I'll only end up frustrated and feeling like I've failed if I try to do it then!

Then, you've got space to write no more than 8 goals. This spread appears in the first Goals section, but it's repeated every 90 days (in seasonal goal refreshes) so there's always an opportunity to change your mind. You get to update them throughout the year! And I find it freeing to know that I can tweak and adjust as time goes on.

Once you've set your goals, there are action plan pages that help you break down a big goal into mini goals and action items. One of the changes to the 2021 edition is that these action plans are now included in the 90-day Goal Refresh, which I love. As you can probably tell above, I created my own workaround. Here's what I do:

+ Big Picture Goal: For 2020, I have six big-picture goals. The wording of these is more abstract and not necessarily measurable – like my goal to nurture my relationship with Nick and our boys. Mine haven't changed this year, partly because I made them with our new baby in mind and that's been fitting for what life is like with COVID-19.

+ Quarterly Goals: On the action plan pages, I made mini goals for the first quarter. When those pages weren't repeated later on, I just used that concept to write quarterly goals in my Goal Refresh. These goals are more specific and are actions I can take. So, taking the same big picture goal I mentioned above, my quarterly goals might be things like date nights with my big boy or checking a family adventure off our 20 in 20 list.

But how do I break down my goals even more? That brings us to the Monthly tabs!


MONTHLY
The spread above is only part of what you'll find in each month's tab! This sections helps you track your progress, plan for the month ahead, follow through on making it happen, and then review at the end of the month.

At the beginning of each new month, there's a preparation page where you can write down important to do's, things you're excited for, what's worrying you, and what you're hoping for in this coming month. Then, there's a calendar spread, which I skip. I've seen creative uses of these pages, but none seem to be a natural fit for me right now. After that, there's space to brainstorm goals and action items you could focus on that month. This page has changed for 2021, and I think the new layout pairs even better with what comes next:

The Tending List! This is my favorite part of PowerSheets and what's made the biggest difference for me this year. This page gives you a spot to write down Monthly, Weekly, and Daily Action Items. And I'm so obsessed with it! Some months I fill up every line (like above) and others just a few. At the end of the month, my lists are never perfectly filled in. But there's progress! Every single month, I make progress. And little by little, it adds up to a lot. 

Before moving on to the next month, there's a Month in Review page to write about things where you're making progress and what you're choosing grace over guilt about right now. It's a nice way to wrap it up!


WILDCARD PAGES
The Prep Work, Goals + Goal Refreshes, and Months are the bulk of PowerSheets. But you have the opportunity to customize them a little more with Wildcard pages! You can buy a pre-printed set or print your own (which I did above) to help dig a little deeper into some of your goals. Here are some of the options available:

+ Perpetual Calendar
+ Fun List
+ Books Read This Year
+ Relationship Tending
+ Financial Check-In
+ Go-To Meals
+ Goals At-a-Glance

I've added the Fun List to the front of my PowerSheets with my family's 2020 bucket list on it. I add the Goals At-a-Glance page to each month's tab and write down one main action item per goal for that month. I love using the Content Planning page, above, to brainstorm blog posts. My goal this year has been to share two posts per week, and this page has helped me make significant progress. I used to have a more detailed planner focused solely on my blog, but this more simplified page has been doing the trick. There are a lot of options!


Would I recommend it?
Well, I bought the 2021 version, along with their accessory pouch! For me, the PowerSheets haven't been a magical process or product – but they have been a powerful tool of accountability. I already knew what mattered to me and what goals I wanted to accomplish but didn't have a plan to make them happen. Now, I have a system.

I love the encouragement throughout that little-by-little progress makes a difference. I've seen the truth of that this year! Before, I would feel overwhelmed by things I wanted to get done and wouldn't know where to start. Or I'd get started but would abandon it if I wasn't totally consistent, procrastinated too much, etc. It's easier for me to track the changes I'm making, to see clear evidence that I've implemented new habits and accomplished important goals. At the end of the year, I'm planning to blog more about the progress I've made but you can see some of my progress in my monthly Goals posts. I've definitely found the process valuable.

Additionally, I'm excited about the changes they've made for next year, especially the streamlined prep work and how the refreshes align more with reassessing your goals every 90 days. The few things I haven't loved – elements of the prep work, the way goal refreshes were structured, the format of the section to brainstorm for the Tending List – have all been changed for 2021. I love a company that can refine their product!

If you want a full flip through of PowerSheets, check out this video below:


Do you use a goal planner? This is my first time!
Tomorrow I'll be chatting about my reading log.

If You Give a Girl a Planner: Daily Life

Oct 28, 2020


If you give a girl a planner, she's going to ask you for a pen, some stickers... and maybe a notebook to go with it. I'm so obsessed with all things paper! I love trying new things and then blogging about it. So, for the next few days, I'm sharing my 2020 planner lineup. I'll talk about what I'm using for my daily life, personal goals, reading log, and bookish notebook. Today's post is all about what keeps my life organized and on track: my daily planner.

The last time I blogged about my planners, in 2018, I'd fallen in love with Happy Planners and used them for my gratitude journal, my life planner, my blogging and bookish planner, and my reading journal. But in the summer of 2019, I realized that my life planner started to feel like a chore. I was frequently writing in it after the fact, and it became more decorative than functional. So, I knew it wasn't working for me anymore. I changed to an academic year Simplified Planner. From August 2019 - July 2020, I used their weekly planner. I never posted about it, but it was exactly what I needed. It was simple, functional, and beautiful. And the weekly format had plenty of space for occasional appointments, a handful of daily to do's, and a little blog planning.

For 2020-2021, I picked Simplified Planner's Dapperdesk. I'd wanted to make the switch to a daily planner for a while, and it finally felt like the right time. So, let's talk about why I chose it and how I feel about it!


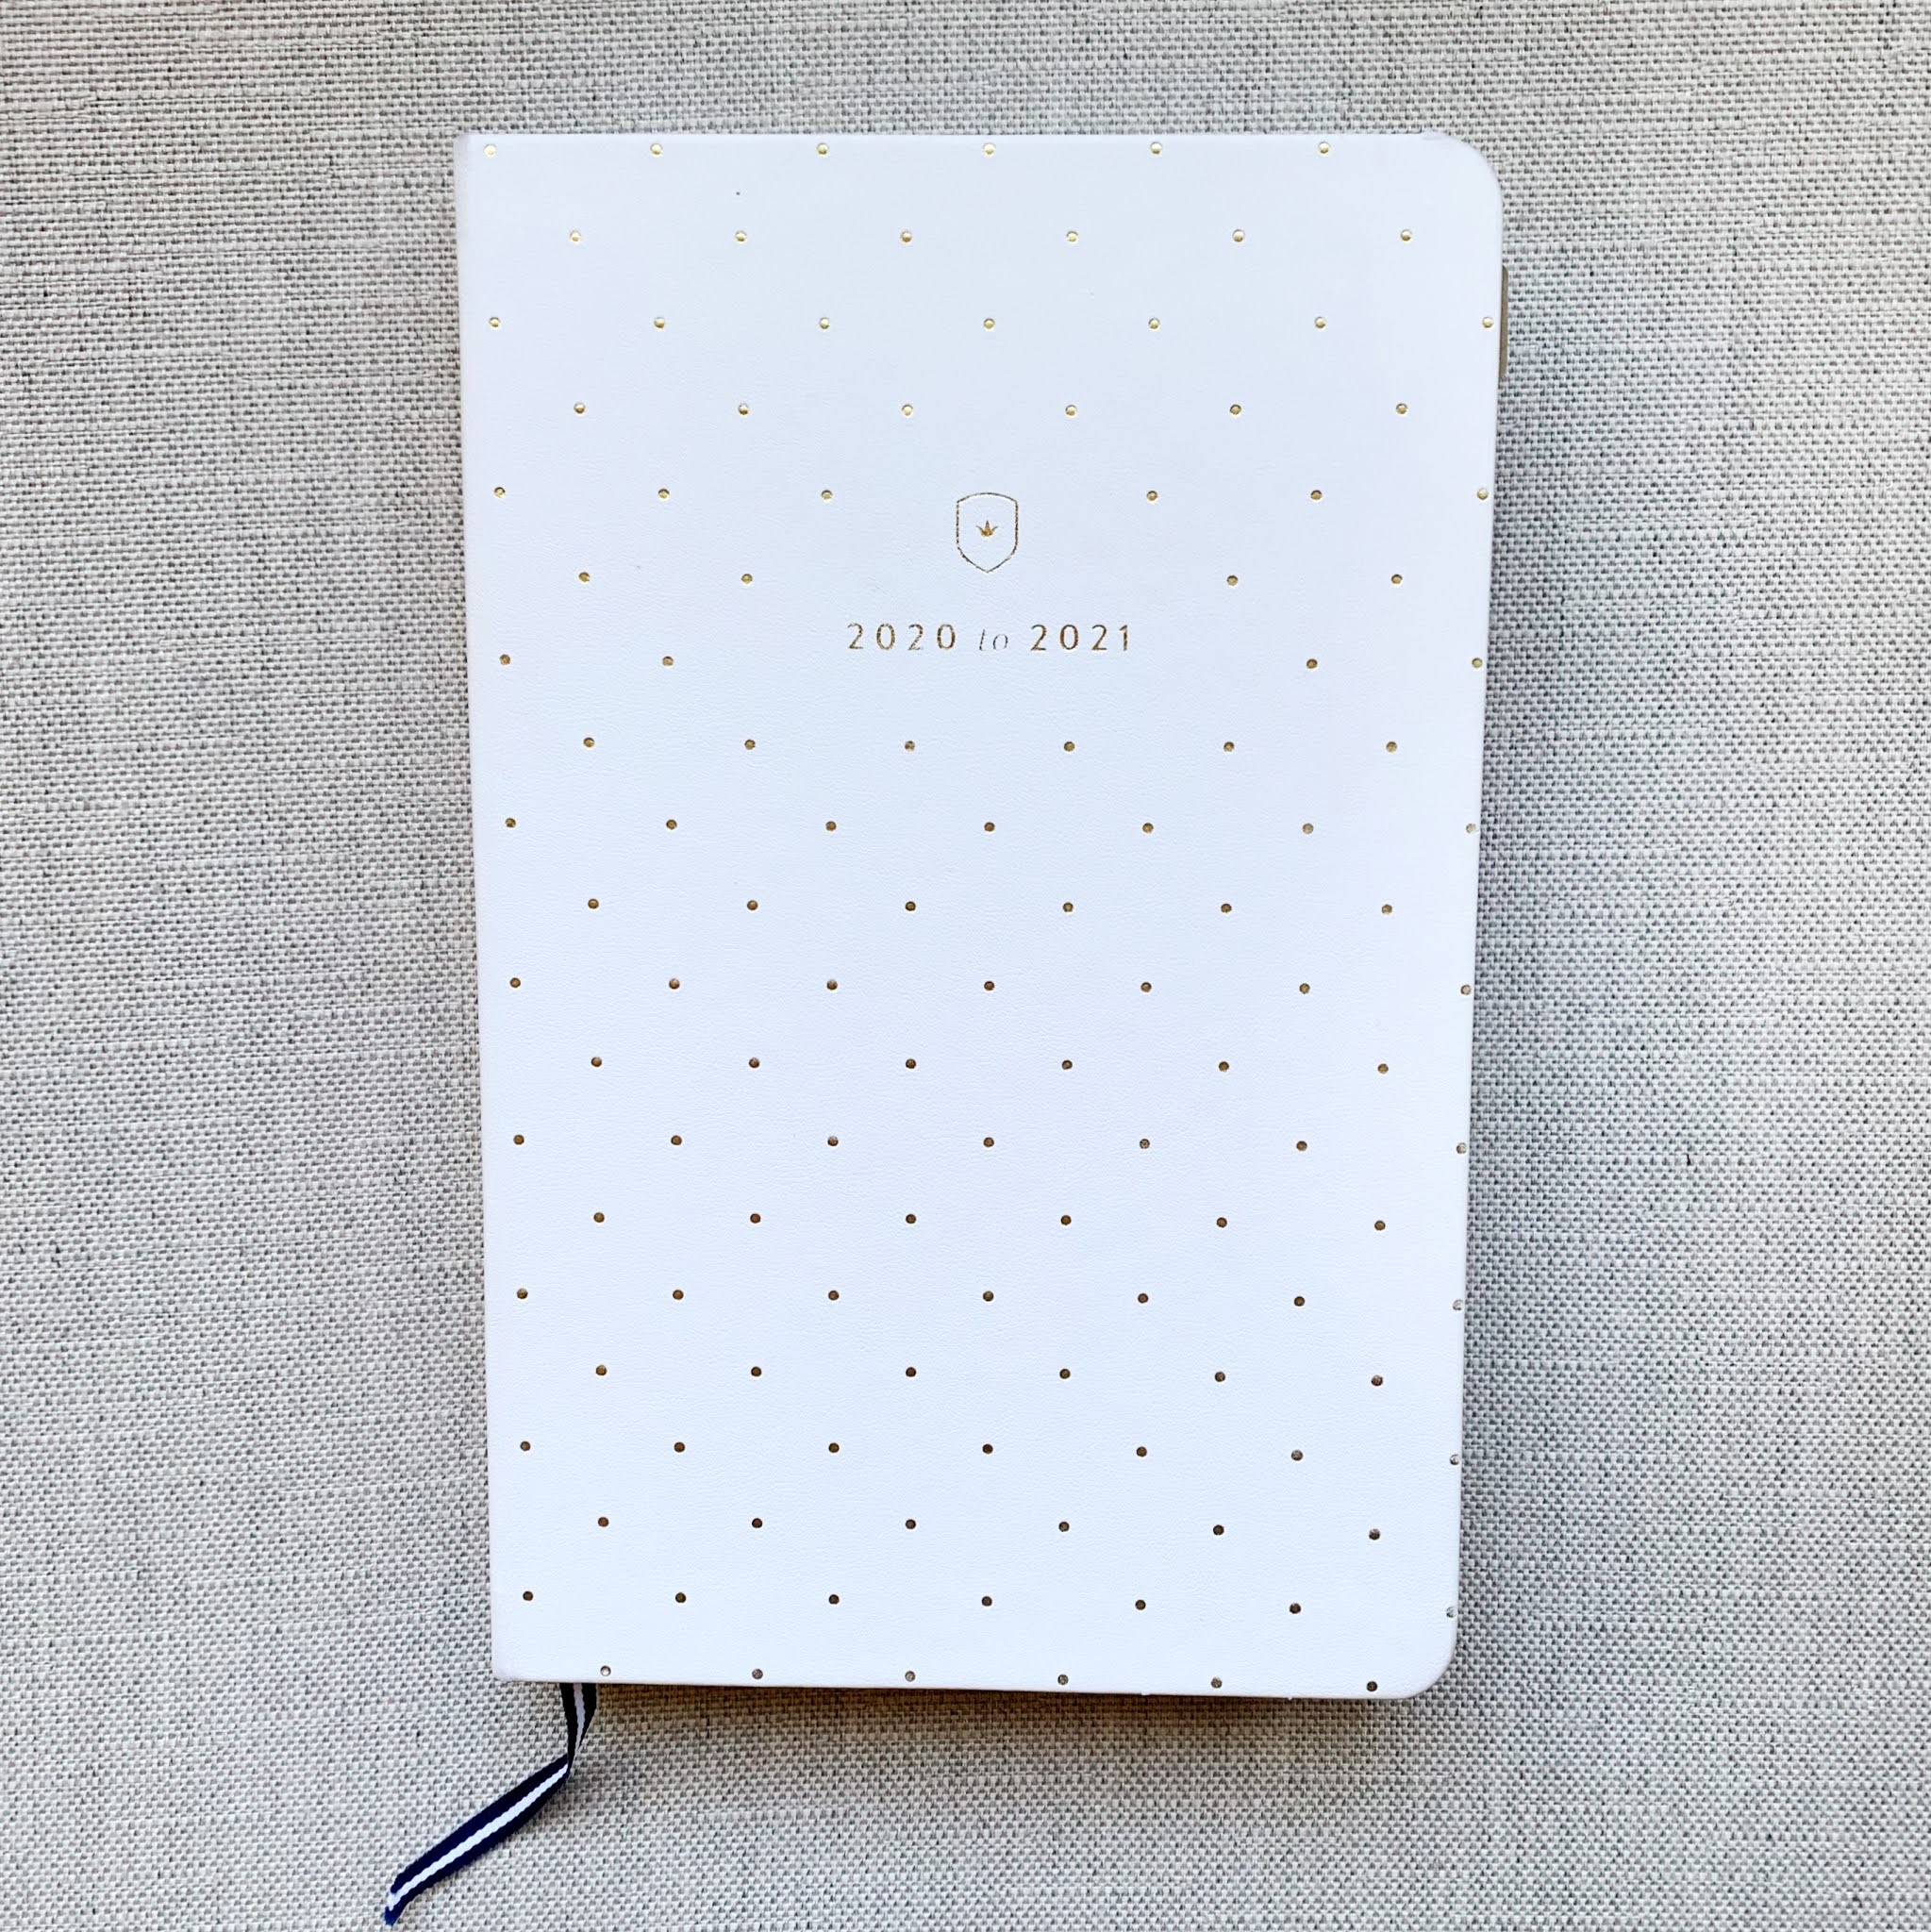
Simplified Planner's Dapperdesk line is their most minimal offering. It is bookbound, like their weekly planner, which works better for me as a lefty than their spiral binding. It covers 12 months – I have the academic year, but the calendar year is available, too. The cover is leatherette, and I love the gorgeous gold dot pattern that I chose.

The inside is their classic daily layout with a few changes – no color, no tabs, all the monthly views at the front, and a full page each for Saturday and Sunday. I wasn't sure I really needed one full page per day, which is one reason I used a weekly last year. I wanted to see whether it felt like enough space and figured that was easier to commit to, especially because my baby was due about halfway through the academic year. It turned out to be exactly what I needed at the time. But for 2020-2021, it was time for a daily. Here's why I chose the Dapperdesk:

+ Classic, minimal look
+ Functional layout
+ Lay-flat book binding (no spiral!)
+ One day per page
+ The in-between size (bigger than their weekly, more portable than their daily)


As I mentioned above, the Dapperdesk doesn't have any tabs and all of the monthly views are together at the front. These were the only two features I was nervous about beforehand, but neither one has annoyed me in my first three months of use. I use the ribbon bookmark to mark the current day, and a small gold Post-It page tab (seen above on the upper right side of the page) to easily flip to the monthly view.

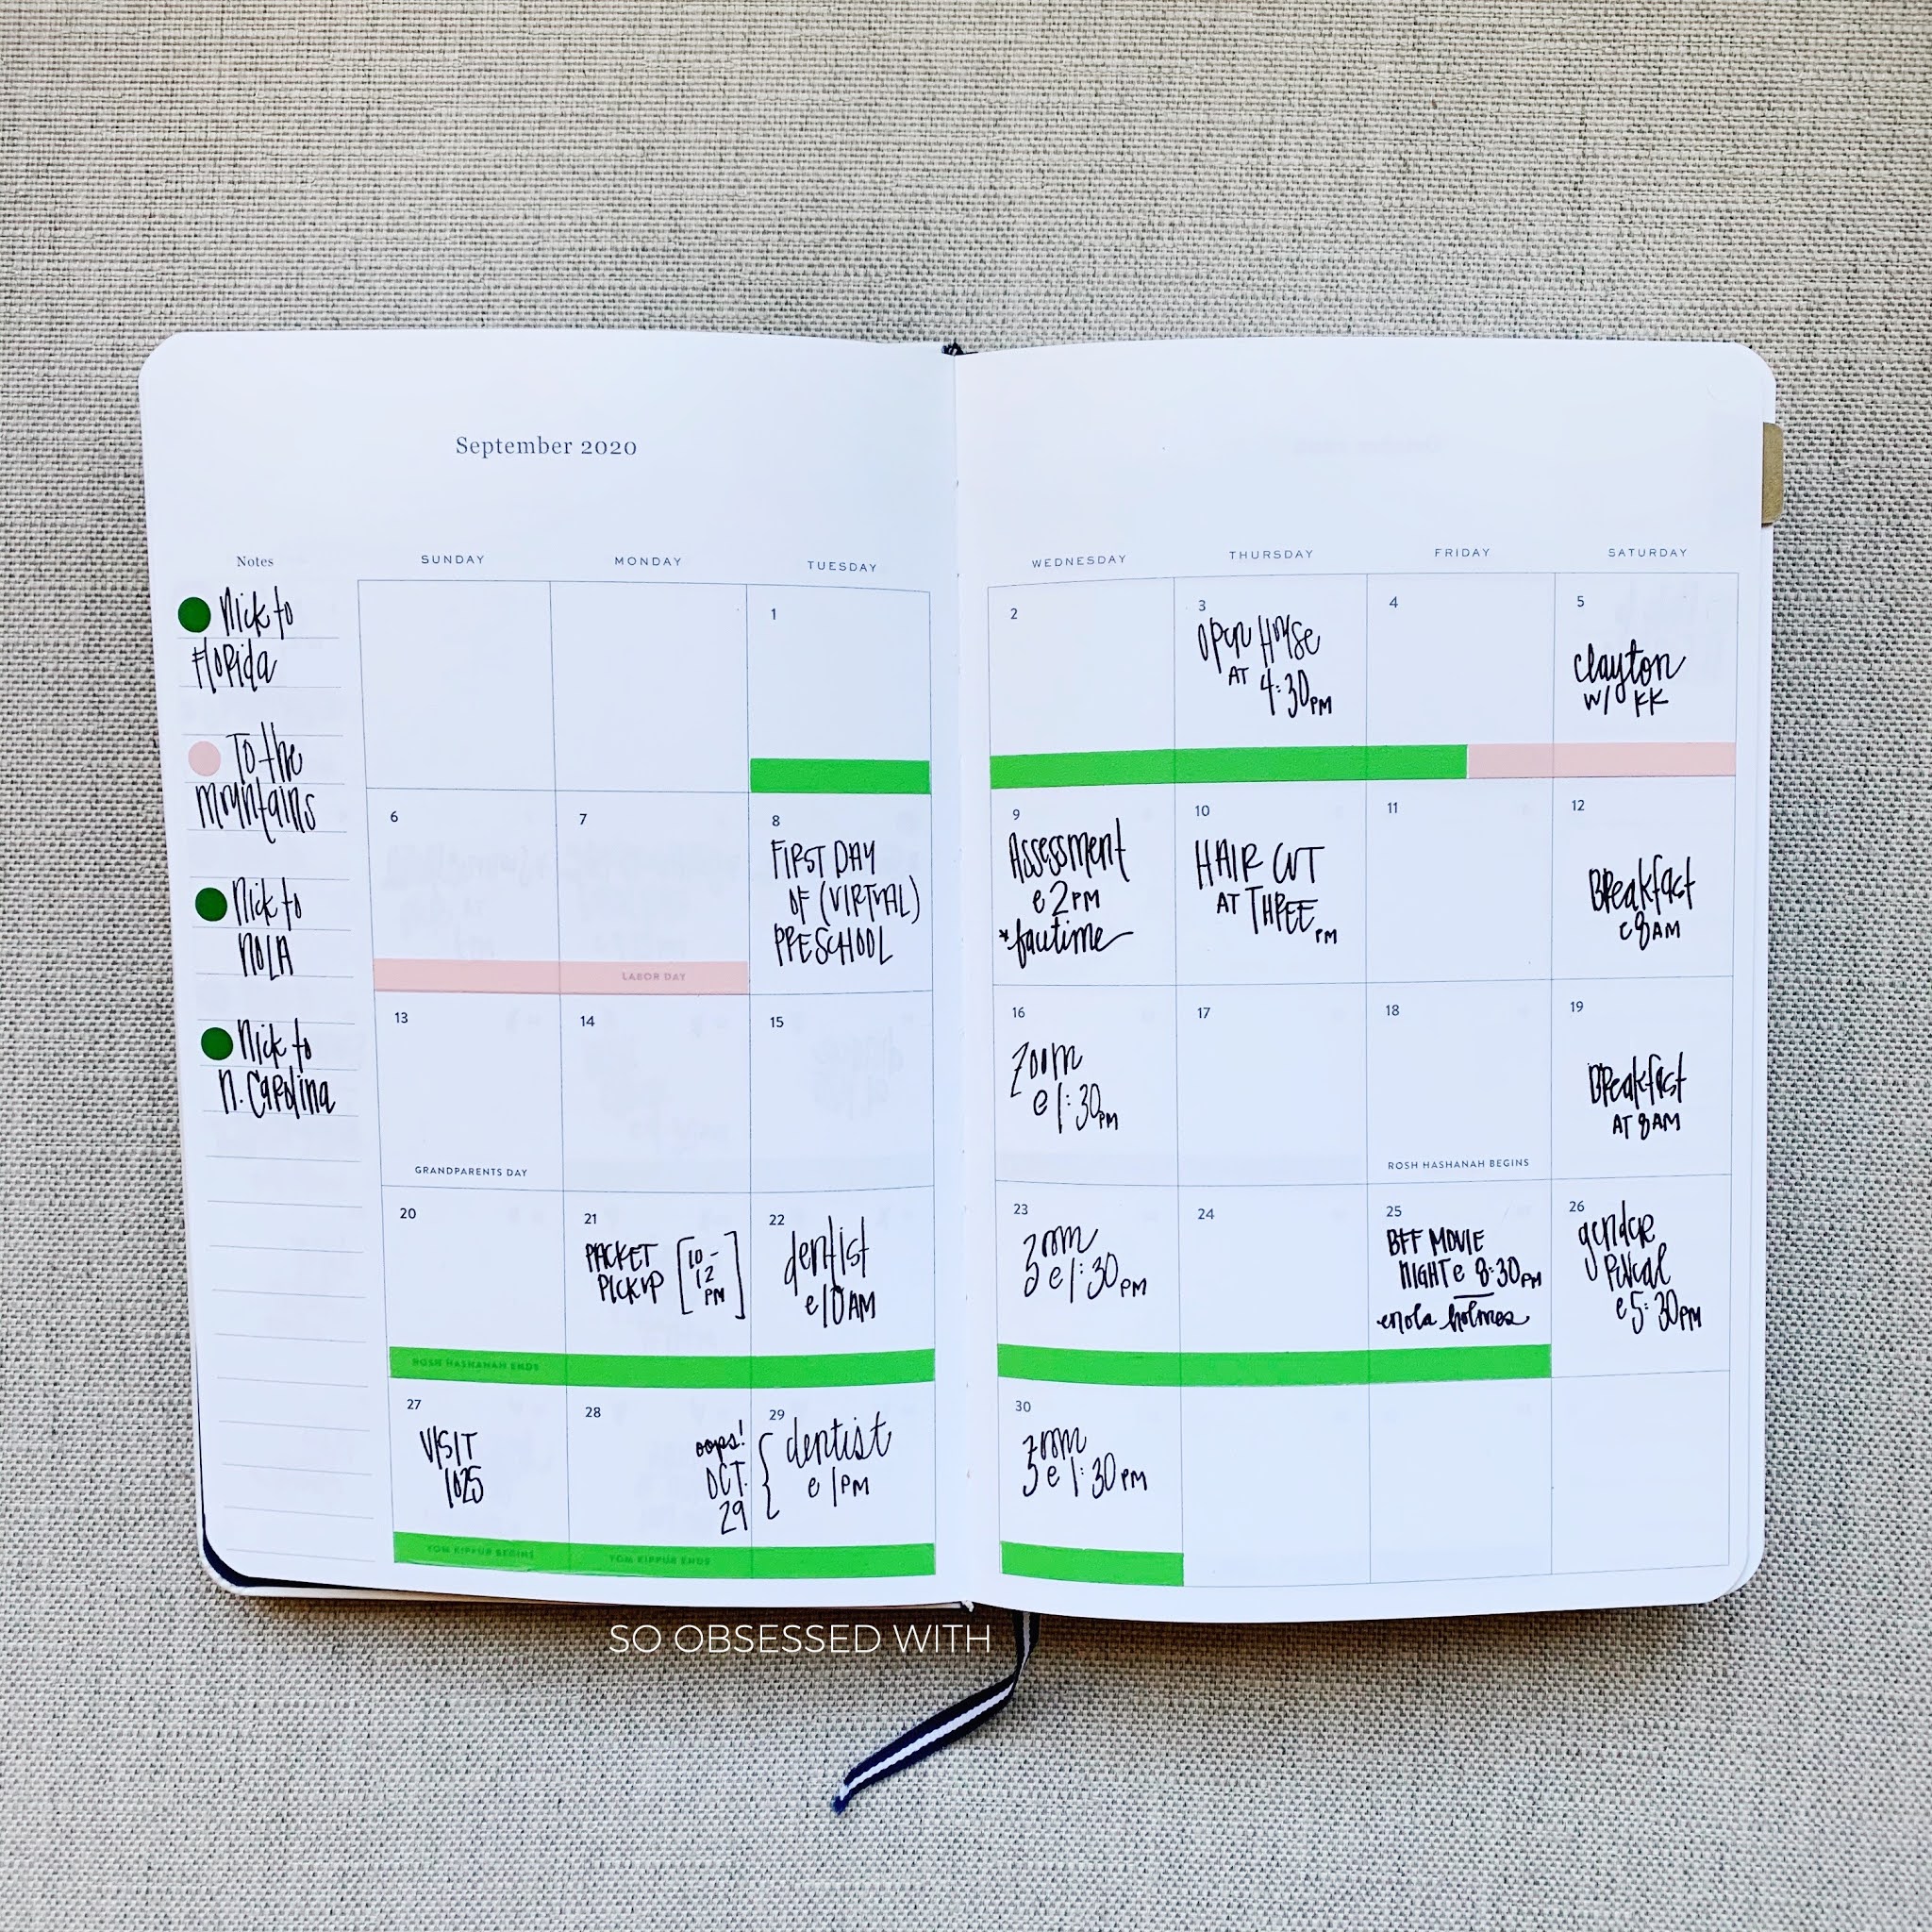
On the monthly spread, I typically write down appointments or events that are happening at a specific time, like my in laws coming over for a Saturday family breakfast. Sometimes I'll add in a more general event, like an adventure to the park with my boys. In the Notes column to the left, I write down birthdays and whatever the washi tape represents. Unlike with my Happy Planner, I rarely use decorative stickers in my Dapperdesk. I do some simple color coding, and use stickers and washi tape when it serves a purpose. Simplified Planner's color-coding stickers come in nine colors, and I've assigned each one a category:

+ Navy: My little boys
+ Green: My husband, Nick
+ Light Blue: My blog
+ Teal (two shades): Meal planning
+ Yellow: Eating out
+ Light Pink: Travel / Adventures
+ Medium Pink: Release (book / music / movie)
+ Dark Pink: Myself

When I use washi, it matches up with my color coding. So, in the photo above, the green is Nick's travel schedule for work and the light pink is our family trip to the mountains. And that's all I do on the monthly view!
 

The best thing about a daily planner is that every day is a fresh start. I never feel like I have to stick to a specific format or regret the placement of a sticker. Just turn the page and try something new tomorrow! I've tried several different things so far, and this is just a peek at one spread. Here's how I'm using the different sections of the page:

+ The hourly column: I usually write appointments or events occurring at a specific time: pest control coming to our house, errands we run, or adventures we go on. And I'll add a dot sticker to a line if an event fits into one of my categories, like a navy dot for my baby's Well Check. Some days this area is completely blank, and that's okay.

+ The to do list column: I almost never write on every line. I don't want to pack that much into my day! In bed each night, I usually spend a few minutes reviewing and prepping in my planner. I'll check off that day's tasks, carry over ones that didn't get done, and add anything new that I already know needs to happen the next day.

+ The Notes section: This is where this planner really wins, in my opinion. You can do anything you want here! I'll meal plan, as you can see in the photo above. I use a little sticker to make note of when I finish a book. I'll write down cute things my big boy says, the baby's milestones, the blog post I published that day, things I want to remember or look up... and so much more. And instead of keeping a separate gratitude journal, I write down one thing that made me happy each day. It's a little bit like having a planner and journal in one, which I love. 

But what about things that can't assign to a specific day? That's when I add in a sticky notes! Sometimes I'll write down a few goals on a sticky note and just move it from day to day. In the photo above, I used a sticky note to pre-plan some extension activities for my son's virtual preschool. His teacher has put a lot of work into making this year special and fun, even at home. But one of my recent goals was to be more proactive about extending his lessons into our daily rhythm. On Sundays, I'll write down his letter, theme, and Bible story of the week along with relevant books we own and could read + extra activities/crafts. Then I can reference it anytime we need something to do, want to reinforce a specific lesson, etc. For Letter D, We went on a Dunkin Donut Date for Letter D and played Find & Seek for Letter F. You get the idea! The planner is just the tool that keeps me organized.


The Dapperdesk planner has 17 notes pages, compared to 31 in the weekly and 4 in the daily. So it's right in the middle, which has been the perfect amount for me (so far). Last year, I barely used those blank pages in my weekly. But this year, I was determined to put them to better use! I looked at my favorite planner account – @plannerstateofmind – for inspiration and then got to work setting it all up. Here's how I'm using my pages:

+ Color Coding Guide: Quick reference for my colors + categories
+ Contact Information: Frequently used addresses and phone numbers
+ Planning Ahead: 2021-2022 appointments past when the planner ends
+ Routines (Daily and Weekly): My daily and weekly household chores
+ Routines (Monthly): Monthly routines for the blog, my planner, photos, etc. 
+ Lessons Learned: Write down what worked and what didn't work
+ Things I Want to Buy for Myself: A wishlist for myself + our house
+ Things I Want to Buy for Others: Gift ideas for my family and friends
+ 20 in 20 Family Bucket List: The same list I shared on the blog
+ 2021 Family Bucket List: A spot for our 2021 list, once I've made it
+ Things for Our Family to Try: Local adventures, activities at home, and places to visit
+ Memories and Milestones: Highlights from our year
+ Goals I Want to Accomplish: Projects I want do, habits I want to start, etc.
+ Celebrate the Wins: Goals I've checked off my list and progress I've made
+ Ideas for So Obsessed With: Brainstorming blog posts
+ Two blank pages: For whatever strikes my fancy!

If you're curious, here's a full flip through of the Dapperdesk planner:


Now that you've gotten to see inside, here are the accessories I typically use. They're mostly just functional: 

+ Simplified Planner stickers, including:
    - Flag Labels
    - Happy Icons 
    - Flags
+ A few FayeCreates stickers
+ Some honeyinked icon stickers
+ Thin washi, like this pack from Recollections

Well, there you have it: my 2020-2021 planner for daily life! I'm loving it so far, and I think my only con has to do with the cover. As much as I love the look, I'm still a little worried the gold dots will wear off the longer I use it. And I've noticed one or two spots where the leatherette has gotten a little scratched off, like the time I caught the edge of the planner on the pouch's zipper. Other than that, I love everything about it so far!

If you'd like to try Simplified Planner, you can get $10 off your first order with this affiliate link.

Do you use a paper planner? Tell me about it!
And check back tomorrow for my Powersheets goal planner.

My Mini Happy Planner: Reading Log

Jul 27, 2018


Back in December, I reflected on my favorite things of 2017 and noted that Happy Planner was at the top of the list. I bought my first one that May after seeing Lindsey from Bring My Books raving about them. And though I swore I wouldn't buy all the things, I should have known that I'd be so obsessed with it. It started with sticker books and soon spiraled into making my own printable pages. So, I thought it would be fun to spend this week talking about how I'm using them. Happy Planners come in three sizes: Big, Classic, and Mini. I have one of each, and they each serve a different function. It's time to chat about my final Happy Planner: my mini!


I use my mini Happy Planner as a reading journal! I've got a notebook with a list of what I've read each year that I started when I created my blog back in 2011, but it's just a list of titles and authors. I've always wanted to do something more, and that's where this one comes in! I started it last year, so I'm on my second one now.

At the beginning on every month in a Happy Planner, there's a recap/overview page. As you can see, I've covered some of the categories with washi tape to make them work as a reading journal. The list underneath April is labeled Top 4, and it's my four favorite reads from that month. Noted is a little breakdown of the source of what I read: TBR, Review and Re-Read. Quote is my favorite quote of the month, and Audio is just the total number I listened to.

The only thing to keep in mind, if you want to use the mini Happy Planner as a reading journal, is what this page looks like in whichever one you pick. Some minis have versions of this page that are hard to re-label.


On the monthly calendar, I write the title of the book on the day I finish it. Last year, I wrote more in the Notes sidebar (like the genre breakdown) but didn't continue it. If I finish two books in one day, I'll draw a line dividing the box in half. It's interesting to flip through and see months with reading slumps versus binges!


Mini Happy Planners are all in this horizontal format. It's worked perfectly as my reading journal because it's just enough space for a few thoughts on what I've read but not so much that I dread writing in it. In the past, I've given up on reading journals because it felt like writing a review – and I already do that here on the blog! 

On the day I finish a book, here's what I write: 

1. The title and author on the first line
2. The format, source and rating on the second line
3. A few brief thoughts on the book on the last three lines

And that's it! I don't write in complete sentences or try to make it sound nice. It's really just for recording my overall impressions. It's useful for me because I rarely write a review immediately after finishing a book, but it's not hard to grab this little notebook and jot down a few thoughts when I'm done reading.

For the sake of this post, I specifically chose a week where I finished a lot of books so that you could see it really filled in. But there are lots of weeks with only one or two books recorded! In busy weeks where I finish more than one book in a day, I'll take a little washi tape and cover up the date of a day where I didn't finish anything and just label it with the new date. That's why you see Sunday • 18 (Cont.) at the top of this page.


And if I'm really tearing through books and finish so many that I can't re-label the existing spaces, I'll just stick a sheet of lined paper in the middle of that week's spread. I'll do the washi + Sharpie thing again, and then I'm all set.


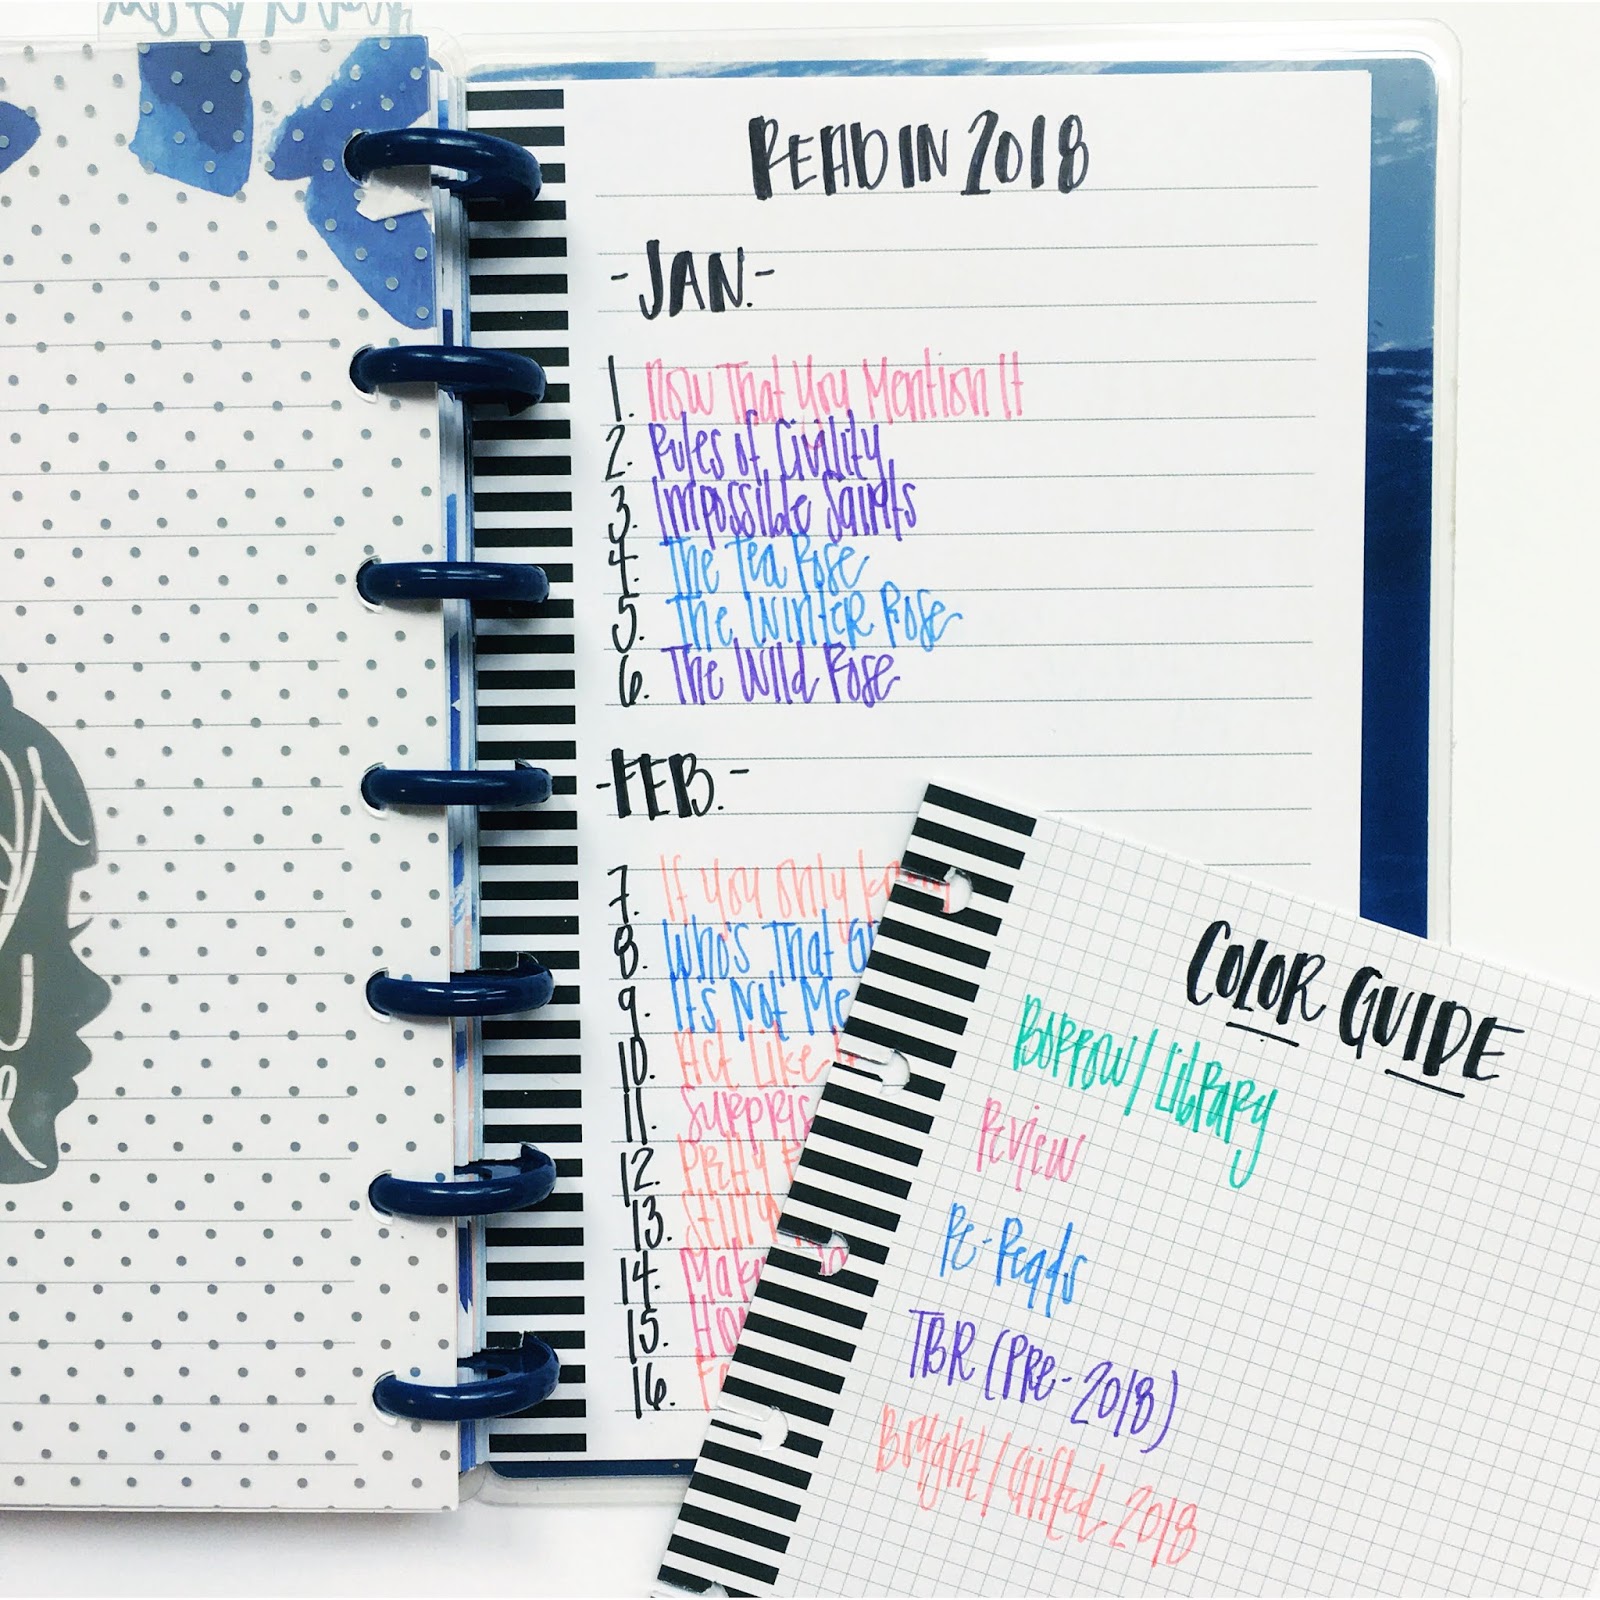
At the very back of this journal, I have the titles of what I read color coded by the source. That's how I format my Read in 2018 page on the blog, and I just like having a physical version of it.

Okay, that's it. I hope you've enjoyed taking a tour through my Happy Planners! In case you missed it, I chatted about my gratitude journal, my daily planner, and my blogging planner and bookish printables. If you have any questions, just let me know! Whether it's tips for making your own printables or sticker book recommendations, I'm happy to help. And if you've every written about your planner, leave a link in the comments. I'd love to check it out!

** GIVEAWAY **

I've got a Happy Planner giveaway – with a bookish twist, of course – that will be going up on my Instagram account later today. I will come back on here and embed the post once it's live so you can see all the details!

** GIVEAWAY! ** I loved showing y’all my planner this week and am so thankful for the #bookstagram community that I thought it was time for a giveaway! Here’s what’s up for grabs: . 1. Happy Notes with 3 dividers + 60 pages of dot grid note paper (flip through in my story) 2. 12 pages of TBR printables (4 each of physical, audio & e-book) 3. $25 Amazon gift card (to add more to your TBR, of course!) 📖 . ** Here’s how to enter: ** 1. Must be following this account 🤓 2. Like this photo! 📸 3. Tag a friend in the comments & tell me a book you recently added to your to To Be Read (TBR) pile! 📚 . US only. Ends August 2 @ 5 p.m. ET. Please don’t follow just to unfollow. 💖 • #soobsessedwithbooks #books #planner #happyplanner #booklover #bookworm #booknerd #bookstagrammer #bookblogger #happynotes #giveaway
A post shared by Hannah (@soobsessedblog) on

My Classic Happy Planner: Books & Blogging

Jul 26, 2018


Back in December, I reflected on my favorite things of 2017 and noted that Happy Planner was at the top of the list. I bought my first one that May after seeing Lindsey from Bring My Books raving about them. And though I swore I wouldn't buy all the things, I should have known that I'd be so obsessed with it. It started with sticker books and soon spiraled into making my own printable pages. So, I thought it would be fun to spend this week talking about how I'm using them. Happy Planners come in three sizes: Big, Classic, and Mini. I have one of each, and they each serve a different function.  Today, is Part Two of my Classic. It's allll about the books! 


In the Happy Planner world, you'll sometimes hear people talk about "frankenplanning." The word is typically used to refer to the way people will take parts from various planners and combine them into one. So, for example, you might use the cover and rings from one planner with the inside pages of another. It sounds silly, but it's something that I love about this type of ring-bound system. I've been able to make mine exactly the way I want, which you'll see in this post. I have two planners combined into one + a lot of pages that I've made for myself.

The front of my planner has this folder that I'll use as a catch-all for various papers – receipts, an appointment reminder card if I haven't added the info to my planner yet, etc. After the folder, you may notice that I have two sets of July and August tabs. That's because I've combined two planners into one! To keep my planner from getting too thick, I only keep about 2-3 months in there at a time (and just store the additional pages – past and future – on an extra set of rings). The first July and August tabs are for my daily planner, which I highlighted yesterday. But today I'm going to show you the back half of my planner, which is dedicated to all things blogging and books.


With the exception of this monthly spread, the format of the blogging section is a little different than standard Happy Planner pages. I'll talk about it more after the next picture! But, for this monthly overview, I write down blog posts that I've published. They're color coded based on the type of post, of course. I don't write them down until they're written and scheduled, but I'll use small post it notes to plan out future posts.


Most Happy Planners are either vertical (the format in my post yesterday) or horizontal (like a traditional agenda), but there was a limited edition release in a totally different format that I knew would work perfectly for my blog! While the planner itself is no longer available, they do sell this format as a six-month undated expansion pack

Immediately after the monthly overview, this is what you'll see! I'll use the habit trackers on the left for book buying bans, social media posting, replying to blog comments, or any other task that I'm trying to accomplish on a near-daily basis. In this month, I was tracking my book buying ban. 

For Monthly Goals, I always write down at least three. Some repeat almost every month – like posting at least eight times. But the others will change based on whatever I need to accomplish... or have been avoiding. Haha!

In the Checklist section, I write down the title of a book when I finish it. I don't check it off until the review has been published! This list continues on the next page, which you'll see in the next photo.

The Note to Self area is where I write down the publication date and title of anything I need to read and review that month. And sometimes I'll use this section to call out anything extra that's on a deadline!


On the page opposite, there are three main sections. The Get It Done checklist is a continuation of the list of books I've read that month. Typically, those two sections have enough spaces for what I'll read in a month. But there have been a few times I extended the list into the Note to Self section of the previous page.

The top half of this page is just dot grid. I print out a photo of my favorite read from that month and will add a quote or info about when/where I read the book or why I loved it so much. I used two photos in this month because I participated in my first readathon and wanted to make note of that fact in addition to my favorite read!

The Focus On section aligns perfectly with my goal to publish eight posts per month. This is where I plan them out! I sometimes publish more than eight things, but this section helps me decide where to focus my attention and time.


Remember how I mentioned half sheets in yesterday's post? Here's one in use. I love decorating one and making a monthly TBR! I divide it into sections: Review, Borrow, and New Releases (pictured) and then TBR and Audio (not pictured, on the back). I'll write my rating and the date I finished once I've read it. I have another half sheet behind this one with random blog post ideas for whenever I need a little inspiration.


And here's another place where you can tell that this planner format is very different. When I first bought it, I dated this section and used it as daily to do lists. But honestly, I wasn't blogging enough to keep it up. I'd often forget to write anything for several days or end up writing things in after I'd done them – not very useful.

Then, I realized that I could leave them undated and use them in an unexpected way. The first three sections – black circle stickers – are my recurring monthly blog tasks. Pages are the three things I need to update throughout the month. Reading Log is something that you'll see tomorrow, so stay tuned. And Misc. is a catch-all for anything else.

The section below that, Reading Backlog, is a list of books I read in previous months but haven't reviewed. Since I don't keep past months in my planner, I like having a quick reference for what I still need to write.

The next two sections, with blue exclamation point stickes, are for the two posts I publish every month: Recap + On My Shelves and Quick Lit. Underneath both, I have the different things I need to do to complete the posts. From taking photos to adding it to a linkup, this keeps me on track since I rarely finish it all at once.

The last two sections, with orange circle stickers, are books I finished that month. Remember how I had that checklist on the previous page? Well, here's where I write down all the things that need to happen before I can check it off there: take a photo, write my review, update Goodreads, post the review, and add it to my reading log. If it's a review book, the last line will say Log & Submit. The next few pages are this same format, so I didn't take more pictures, but it also includes sections for other posts with the list of things I need to do to finish them. 


After the pages labeled Daily To Do's, there are two lined pages. I divide them into the main categories that I use in my monthly recap posts: Loved, Read, Heard, Watched and Acquired. And I just add things to the relevant sections throughout the month! It's made it so much easier to write those recaps because I'm no longer scrambling to remember those details. That wraps up one month in the blogging section! So, let me show you what comes next...


I tried bullet journaling a few years ago and loved the concept but didn't stick with it. The format was just a little too loose for me, and I didn't like having to draw stuff every month. It was so time consuming because I would be too meticulous and overthink it. When I realized that I could customize my Happy Planner, I knew I could take what I loved about bullet journaling and combine it with a traditional planner. The stuff behind these two divider (which are hidden behind one of the monthly tabs in a previous photo) are where I applied some of those principles. 


As I've mentioned, you can mix and match Happy Planner stuff with multiple planners, different extension packs and more. But my favorite part? You can add your own stuff, too! Happy Planner sells a paper punch that you can use to make anything work with their ring system. And that's how I got carried away making inserts!

Rather than hand draw this, as I did when I used a bullet journal, I just designed a quick printable. Yes, I had to take the time to make it initially, but now I can print it every year (or quickly adjust it with a different goal in the future). As you can see, I've already completed my Goodreads Challenge for 2018. 


When I saw Alexa post about her personal Read or Die Challenge earlier this year, I knew I had to do it, too! Basically, the goal is to read anything on my TBR that's been there since 2016 (or earlier) by the end of the year. And if I don't? It's getting culled! I color the box pink when I finish a book, with the date I completed it noted in a light gray pen to the right of the title. Black means I've DNFed or culled it. 


I created a Series Tracker, too! I alphabetized the list by author's last name, noted the series title, and then used a box for each book in the series. I color them in when they're done! This is just meant to track my progress so that I can quickly see what series I haven't finished, even if it's unfinished due to books not being published yet. I'll probably redesign this page in the future to make it easier to add series to it. 
 

Ah, now we're getting to my favorite pages in my planner! When I was bullet journaling, I drew my TBR on a bookshelf and absolutely loved it. But it was such a pain to keep adding books to it because it would fill up quickly and then I'd have to start drawing it all over again. So, the first printable I created was this bookshelf! I use it for physical copies only, and I divided it up. My Adult Fiction TBR is pictured here. I color in a book when I complete it, and black book means I DNFed it. The best part? When I fill up a bookshelf, I just print and punch a new page.


After I made the bookshelf, I knew I wanted something for my electronic books, too. So... I made myself a Kindle TBR printable! I just write the title in the spaces, check it off once I've read it, and note the date that I finished it. I have a separate sheet that's just for digital ARCs because I like to group them together.


After my physical and Kindle sheets, I had to make an audiobook one, too. I was clearly looking at the Audible app when I designed it! Right now, I only use this for audiobooks that I own and haven't listened to yet. But I'm thinking about adding some titles on here that I have saved on Hoopla and Overdrive so that I don't forget about them! In the spot where the audio cover would go, I just color it when I'm done and note that I've finished + the date. 

Those are all the printables that I decided to photograph for this post, but that's not all that I've made for myself. Here's some of the other pages I made that I've got in this section:

  • Author Events: A place where I can note future book tour dates + time & location, as they're announced.
  • Book Challenges: All the prompts listed for the Modern Mrs. Darcy and Picky Pledge challenges, followed by blanks that I can fill in with the books I read for each.
  • Book Releases: A yearly overview to track release dates + titles that I need to pre-order or request from the library (so I can be first on the holds list, obvs). 
  • End of the Year Survey: All the questions from this survey created by Perpetual Page-Turner with space left to fill it in throughout the year.
  • Recurring Blog Features: Pages designed for posts I do frequently, like checklists for future editions of So Obsessed With or pages divided into the categories that I use for my end-of-year recaps.  
  • Review Book Tracker: A place to fill in all of the books I've received for review, source, publication date, and whether I've read/reviewed/submitted them.
  • Top Ten Tuesday Topics: The list of upcoming topics + pages to plan for ones I do every year, like Top Ten New-to-Me Authors or Top Ten Books of the Year. 
  • TV Tracker: A section to fill in the show and season, and then check off episodes as I finish them. 


And finally, we've come to the last tab in my planner! The previous tab has all of my printables grouped together, and this last one is for extra blank paper that I can use for brainstorming and other random things. I updated my blog design earlier this year, and this was a page I used in the process to help me visualize the new drop-down menu and list specific tasks I needed to complete. I love creating printables for things that I'll use repeatedly, but it's nice to have a section of paper at the back for things that I'll only need once. 

Okay, whew! I know that was a lot of info, but I wanted to talk about more of these pages because they're unique to my planner and illustrate why the Happy Planner system has been so perfect for me. It gives me what I loved about bullet journaling, combining everything into one place, with so many added benefits:

  • Allows me to use a pre-designed calendar
  • Easier to reproduce frequently-used pages
  • Ability to rearrange pages so that categories stay together
  • Customizable with personal inserts + printables 

Only one more planner to discuss: my mini! It serves a book-related purpose, and I can't wait to show it to you. 

BEFORE YOU BUY: Happy Planners are sold online and in stores at Michaels, Joann Fabric & Craft, and Hobby Lobby. Although you can buy directly from the Happy Planner site, I highly recommend shopping at one of the listed retailers. Why? You can use coupons! There's a reason I can't stop buying stickers... Hello, 50% off one item.

How do you track blogging tasks and/or your TBR?
Check back tomorrow for my mini and a giveaway! 
© So Obsessed With • Theme by Maira G.